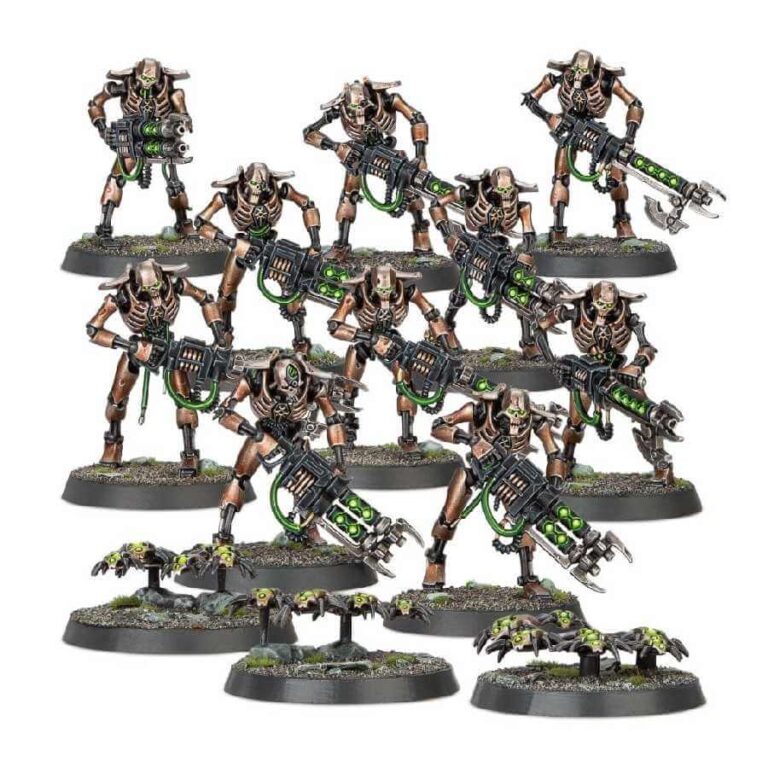
Venture further into the enigmatic world of Canoptek Scarab Swarms, dispersed across tomb worlds and Necron spacecraft. Driven by automated programming, they wield entropic mandibles to dismantle damaged matter, be it organic or non-organic, channeling the extracted energy into restorative protocols.
Whether your strategy involves Gauss Flayers for precise ranged elimination or Gauss Reapers for devastating close-quarter encounters, fortified by the ceaseless swarms of Canoptek Scarabs, this kit serves as the cornerstone for constructing your Necron army. Prepare to witness the orchestration of tactics that meld sheer force with calculated precision, as you command the Necron forces to ascend to unparalleled glory.
What’s in the Necron Warriors box
- x70 plastic components that make 10 Necron Warriors
- x3 Scarab Swarms
- x10 Citadel 32mm Round Bases.
- x3 Citadel 40mm Hex Hole Round Bases.
How to paint the Necron Warriors set
- Step 1: Basecoat the Armor
Start by painting the armor of the Necron Warriors with Runelord Brass using a medium-sized brush. Apply multiple thin coats to ensure an even and rich base color that forms the foundation of their regal appearance. - Step 2: Detail the Weapons
Using a fine detail brush, meticulously paint the weapons of the Necron Warriors with Abaddon Black. Take your time to create clean lines, accentuating the contrast against the brass armor for a striking visual impact. - Step 3: Green Details
Switch to a smaller brush and apply Warpstone Glow to the green details, such as the eyes and energy sources. This vibrant color adds an ethereal quality, making your miniatures stand out on the battlefield. - Step 4: Shade the Armor and Weapons
Enhance depth by applying a Nuln Oil wash over the brass armor and black weapons. This wash settles into the recesses, accentuating the metallic and dark areas and adding realism to your miniatures. - Step 5: Layer the Armor
Using Ironbreaker or a slightly lighter shade than the base color, carefully layer the edges and raised areas of the armor. This layering technique creates a captivating metallic gradient that brings out the details. - Step 6: Shade the Green Details
Apply a Biel-Tan Green wash to the green areas, like the eyes and energy sources. This wash infuses depth and luminosity, giving these details an otherworldly radiance. - Step 7: Highlight the Green Details
With Moot Green and a fine brush, add precise highlights to the green details. This step contributes to the brightness and intensity of the energy sources, making them truly pop. - Step 8: Seal Your Work
Preserve your painstaking efforts by applying a matte varnish spray over the entire miniature. This protective layer safeguards the paint and ensures longevity on the battlefield. - Step 9: Basing with Texture Paints
Complete your miniatures by applying Agrellan Earth texture paint to the base. This provides a realistic foundation. Allow it to dry according to the product’s instructions, ensuring a polished appearance.

