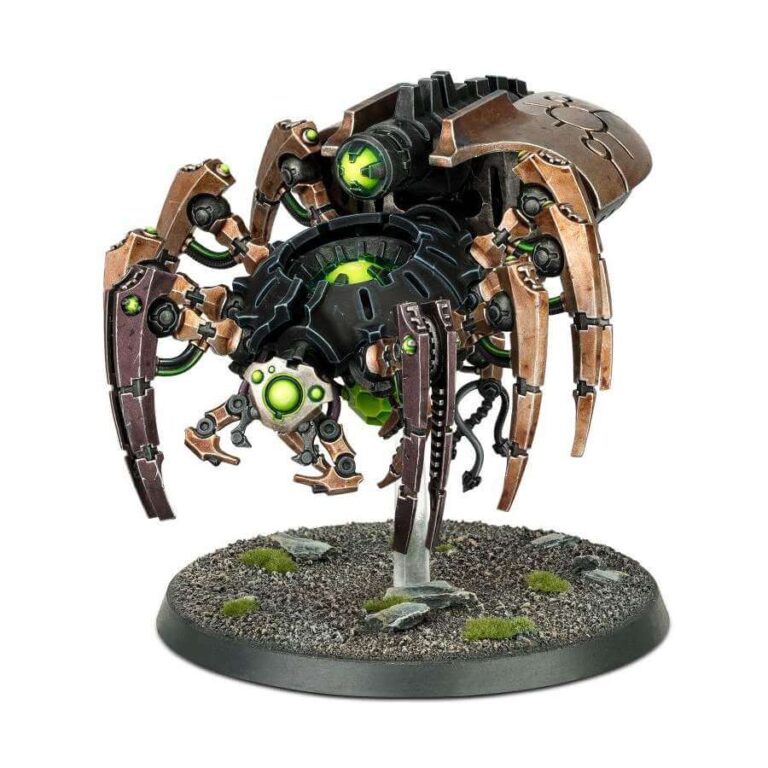
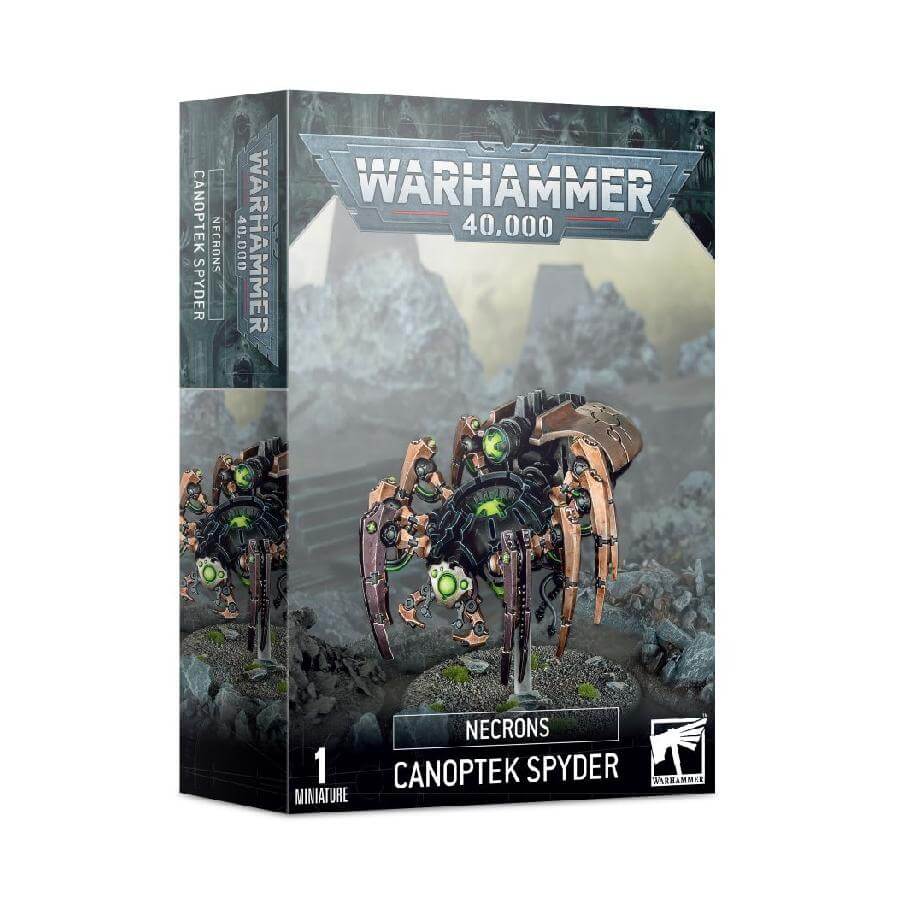
As a triad of Canoptek Spyders converges, a symphony of efficiency unfolds. One assumes command, harnessing the collective processing power of its counterparts to forge an intellect that eclipses the sum of its parts. This orchestration extends its influence, enhancing the prowess of Canoptek Wraiths and Canoptek Scarabs in proximity. A synchronized and precise response to any threat ensues, safeguarding the tranquility of their dormant masters.
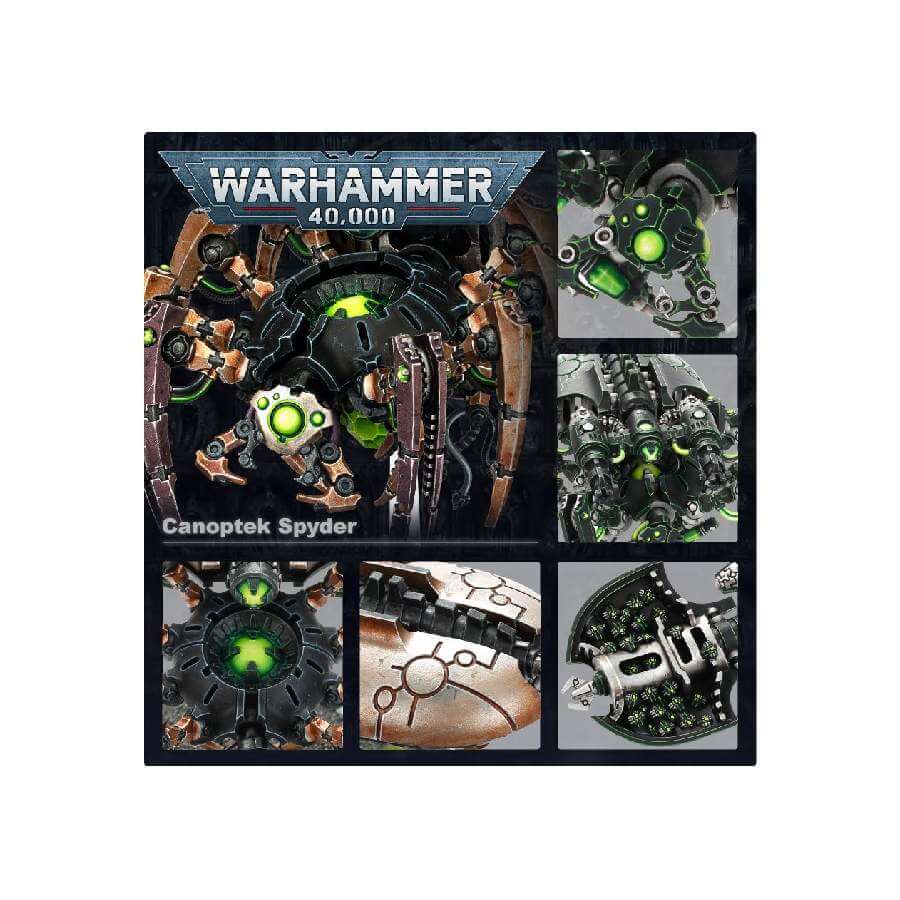
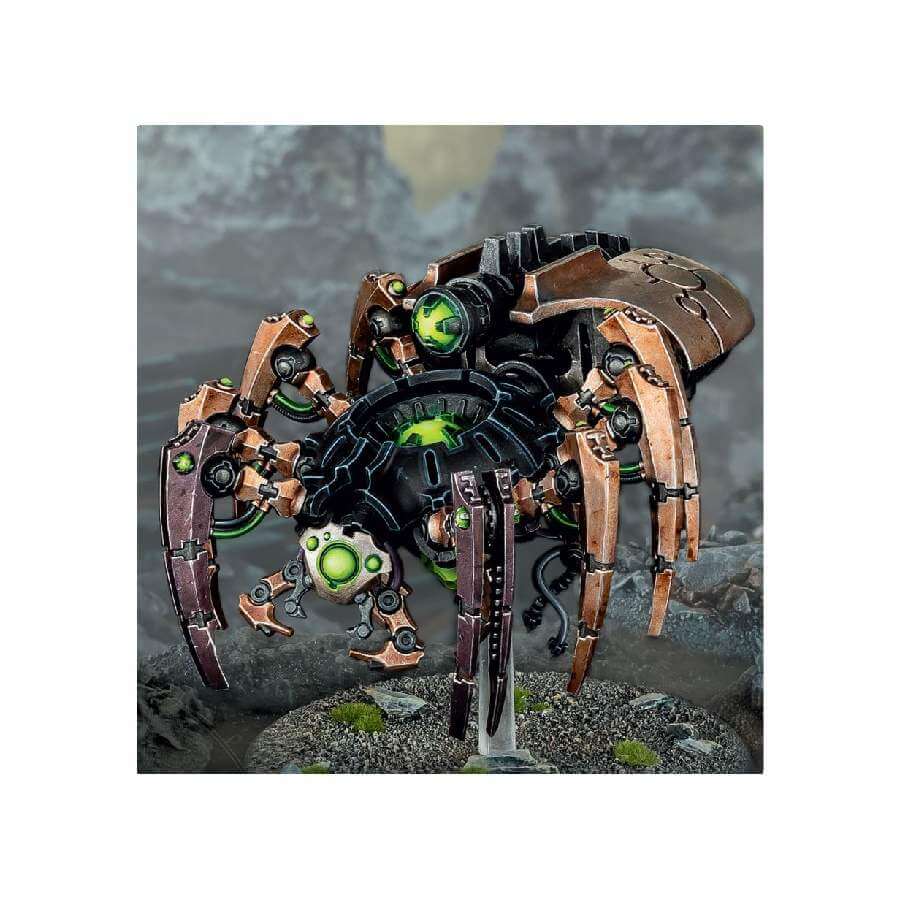
The Canoptek Spyder reigns supreme in the realm of formidable mechanical constructs. Whether rending enemy infantry and tanks asunder with its array of hooks and blades or mending the wounds of your beleaguered vehicles, its versatility is unmatched. Amid the chaos of battle, a unique facet emerges – the ability to birth Canoptek Scarabs, augmenting your offensive might and vexing adversaries with tenacious persistence.
These automatons not only exemplify the Necron’s dominance in the cosmic narrative but also serve as a formidable asset on the battlefield. As you unleash their potential, your foes will bear witness to the power that arises from the seamless fusion of precision and might.
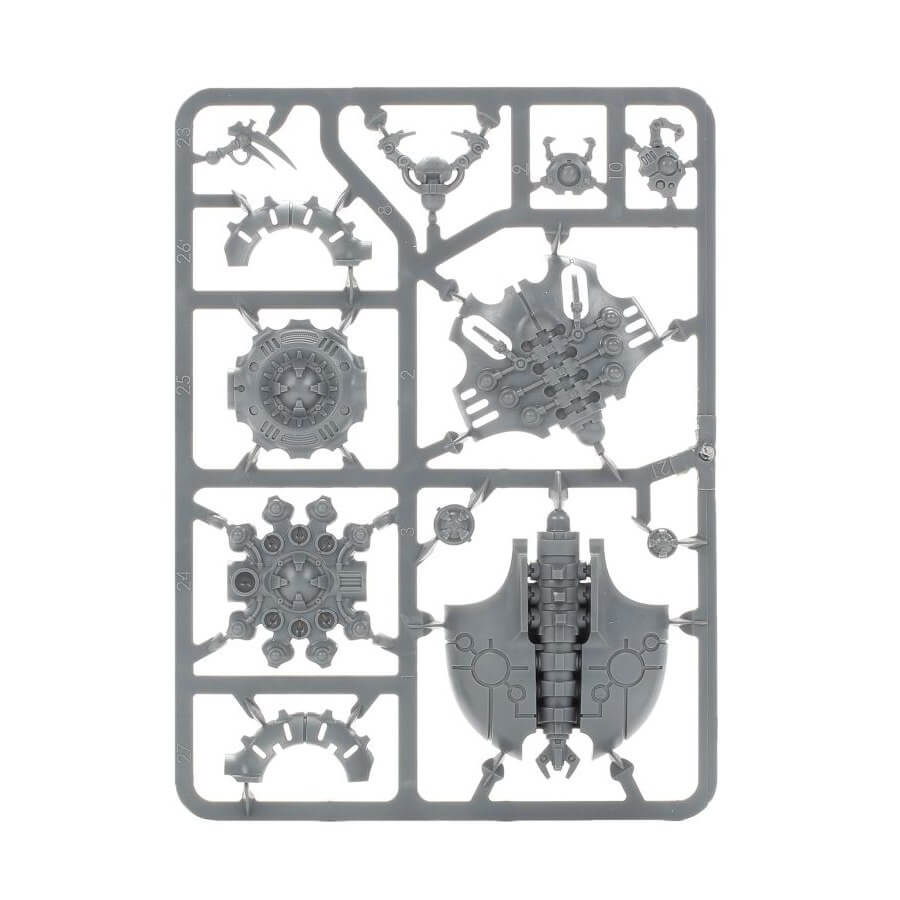
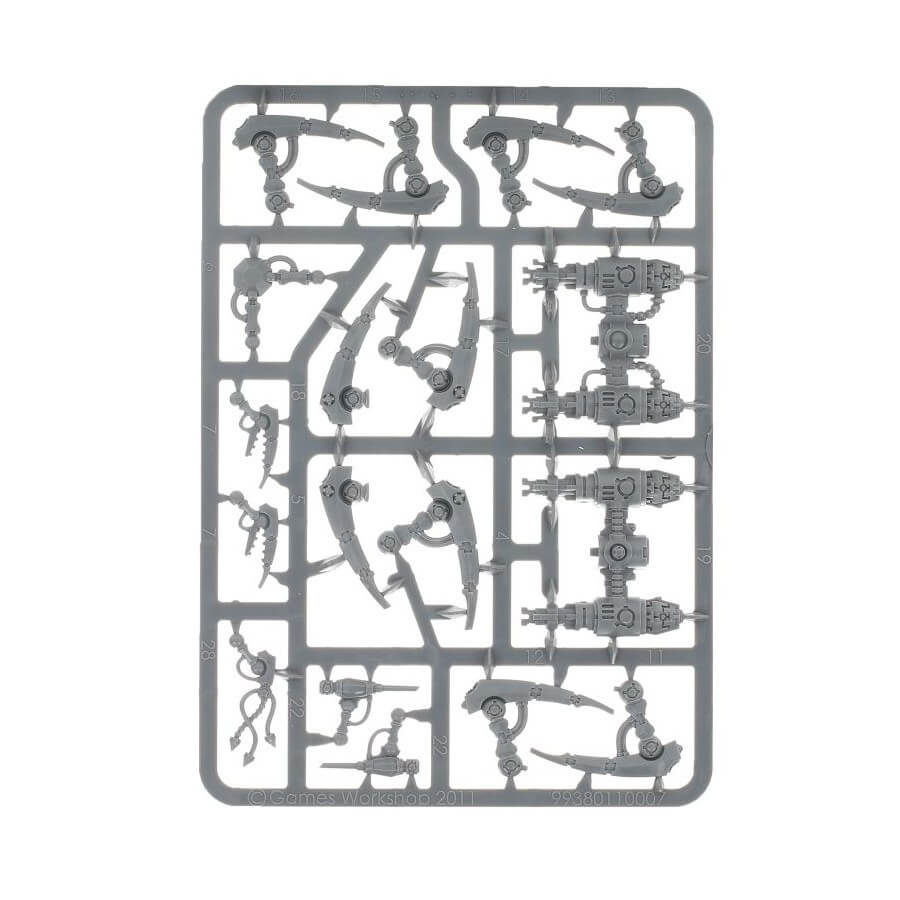
What’s in the Canoptek Spyder box
- x30 plastic components with which to build one Necron Canoptek Spyder.
- x2 ball socket stems.
- x1 Citadel 60mm flying base.
How to paint the Canoptek Spyder set
- Step 1: Base Coating
Begin by applying a base coat to the Canoptek Spyder’s body and limbs. Use a color like Leadbelcher or Iron Warriors to provide a solid foundation for the subsequent layers. - Step 2: Accentuating Details
Highlight the intricate details of the Canoptek Spyder’s mechanical components using a slightly lighter shade. Utilize a paint like Runelord Brass or Retributor Armor to make the details pop. - Step 3: Shading
Apply a shade like Nuln Oil to the crevices and recesses of the Canoptek Spyder to add depth and contrast. This technique enhances the three-dimensional look of the model. - Step 4: Dry Brushing
Dry brush a lighter metallic color, such as Necron Compound or Stormhost Silver, over the raised areas of the Canoptek Spyder. This technique highlights the edges and adds a weathered effect. - Step 5: Eye and Energy Effects
Paint the eyes and energy sources with a bright color like Moot Green to give them a vibrant and otherworldly appearance. - Step 6: Final Highlights
Apply final highlights using an even lighter shade of metallic paint, such as Liberator Gold or Sycorax Bronze. This step enhances the metallic sheen and draws attention to the most prominent details. - Step 7: Basing
Consider the base of your Canoptek Spyder. Use texture paints like Astrogranite Debris or Stirland Mud to create a realistic terrain effect. You can also add some additional details like small rocks or tufts of grass. - Step 8: Varnishing for Protection
Apply a protective varnish like Ardcoat to shield your masterpiece from wear and tear. This step preserves your hard work and adds a polished finish.