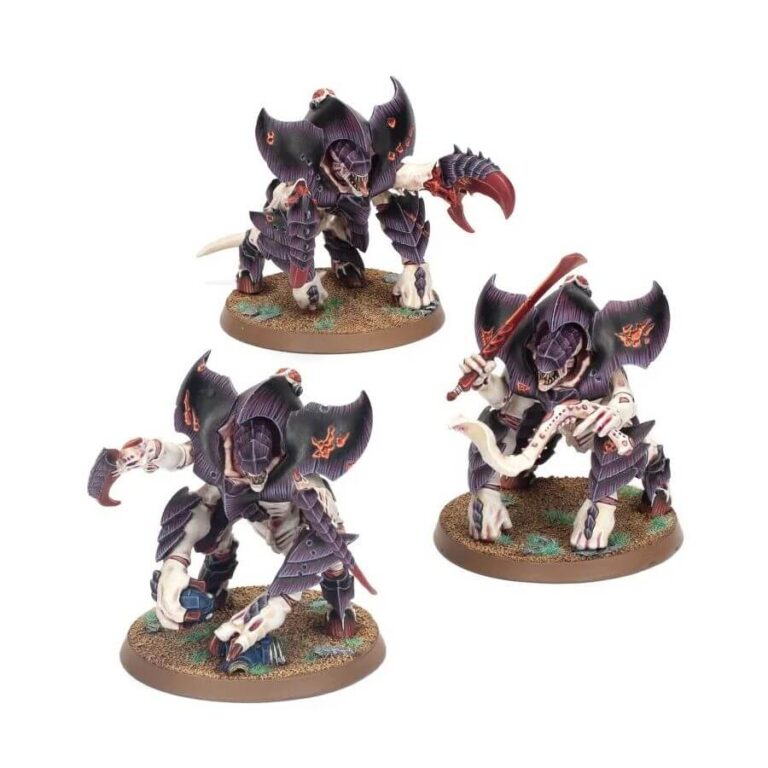
The Tyrant Guard offers versatile weapon options, with each Tyranid member able to wield a pair of crushing claws, bone sword and lash whip, or a pair of scything talons. With three sets of each weapon choice available, you can equip the entire unit uniformly. Additionally, each Tyrant Guard model can be customized with battle-damaged shoulder armor, adding a touch of realism to their appearance on the battlefield. Prepare your Hive Tyrant with this stalwart defense, and witness the indomitable presence of the Tyrant Guard as they shield your leader from harm!
What’s in the Tyrant Guard box
- x102 plastic components with which to make either 3 Tyrant Guard or 3 Hive Guard.
- x3 Citadel 50mm Round Bases.
How to paint the Tyrant Guard set
- Step 1: Carapace
Begin by painting the carapace of the Tyrant Guard with Naggaroth Night, a deep and rich purple hue. Use a medium-sized brush and apply the paint in smooth and even strokes, covering the entire surface of the carapace. Take your time to ensure complete coverage, and you may need to apply multiple thin coats for a solid color. - Step 2: Flesh
Next, turn your attention to the exposed flesh areas of the Tyrant Guard. Use Rakarth Flesh, a pale cream color, to carefully paint these sections. Exercise precision to avoid smudging the adjacent carapace or claws. You can also use a smaller brush for better control. - Step 3: Claws
The menacing claws of the Tyrant Guard deserve attention to detail. With Khorne Red, a striking deep red shade, paint the tips of the claws. Achieve clean lines by using a fine-tipped brush. Make sure the red color stands out vividly against the contrasting carapace. - Step 4: Shade
To add depth and realism to the miniature, apply a shade such as Nuln Oil to the recesses of the carapace, flesh, and claws. This will create shadows and enhance the overall appearance. Use a shade brush to carefully apply the wash to avoid any unintended smudging. - Step 5: Layering
Once the shade has dried, it’s time to bring out the vibrancy of the colors through layering. Use Xereus Purple to add thin layers on the carapace, gradually building up the color to achieve a smooth and blended effect. Similarly, layer Kislev Flesh onto the exposed flesh areas and Evil Sunz Scarlet on the claws. This technique will create depth and a seamless transition between colors. - Step 6: Highlighting
For a professional finishing touch, employ highlighting techniques. Use White Scar to delicately highlight the edges of the carapace, adding subtle reflections and enhancing its three-dimensional appearance. Employ Pallid Wych Flesh to highlight the exposed flesh areas, emphasizing the raised points to make them stand out. Use Fire Dragon Bright to accentuate the claw tips, giving them a sharp and menacing look. - Step 7: Final Touches
Take a moment to carefully review the miniature and touch up any areas that may need refinement. Ensure the colors are consistent, and the details are crisp. Make any necessary adjustments to achieve a high-quality paint job.

