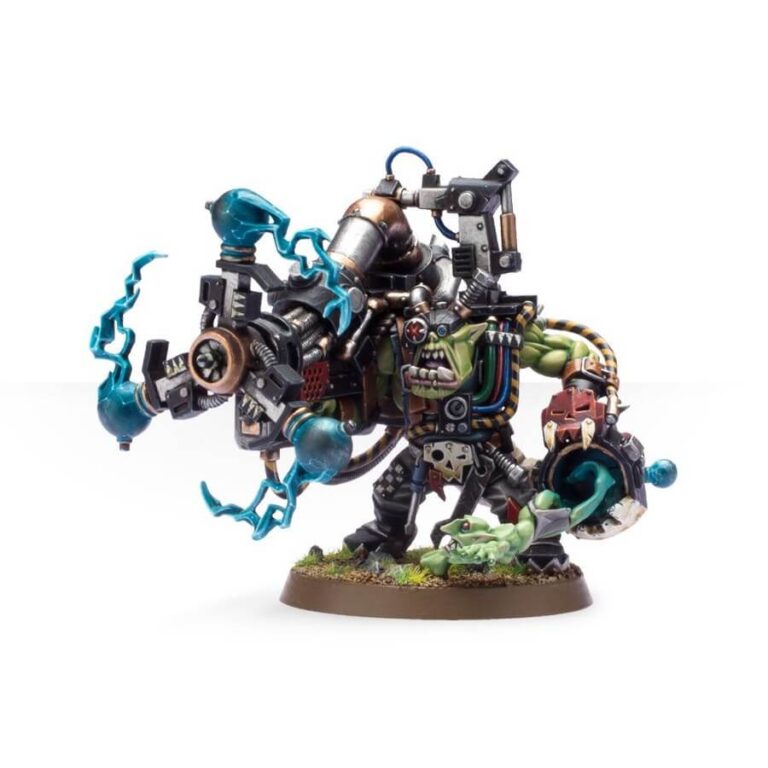
Big Meks, fueled by an insatiable Orkish desire to craft ever more colossal and devastating war machines, lead the charge on the battlefield. Their ambitious endeavors may result in some calamitous mishaps, but they have also birthed deadly weapons like the infamous Shokk Attack Gun.
At the heart of this creation lies a narrow force field tunnel that delves deep into the Warp, opening at the gun’s front and emerging wherever the operator aims. Within this Warp tunnel, hordes of snotlings, accompanied by the occasional squig, are hurled with reckless abandon. As the Mek deftly aims at the enemy’s location, these Warp-crazed snotlings rematerialize in the most unexpected and destructive manner, causing havoc amidst the enemy ranks.
What’s in the Big Mek with Shokk Attack Gun box
- x13 plastic components that make 1 Big Mek with Shokk Attack Gun.
- x1 Citadel 40mm Round Base.
How to paint the Big Mek with Shokk Attack Gun set
- Step 1: Prime Your Miniature
Begin by priming your Big Mek with Shokk Attack Gun model with Chaos Black or any other primer of your choice. This creates a smooth surface for the paint to adhere to. - Step 2: Basecoat the Model
Apply a basecoat of paint to the Big Mek’s skin and the Shokk Attack Gun. For the skin, use a green color like Warboss Green, and for the gun, you can use a metallic color like Leadbelcher. - Step 3: Paint the Armor and Details
Next, paint the Big Mek’s armor with a brown color like Rhinox Hide or a similar shade. Add any additional details on the model using contrasting colors, such as Runelord Brass for metallic components or Ushabti Bone for other details. - Step 4: Highlight the Skin and Armor
Using a lighter green color like Skarsnik Green, carefully apply highlights to the Big Mek’s skin. For the armor, use a brighter brown color like Mournfang Brown to add highlights to the edges and raised areas. - Step 5: Paint the Shokk Attack Gun Details
Now, paint the intricate details on the Shokk Attack Gun using suitable colors for the various components, such as red for the targeting lens, or bright colors like Wazdakka Red or Baharroth Blue for additional details. - Step 6: Add Final Details
With a fine brush, add any final touches to the model, such as glyphs or symbols on the Shokk Attack Gun. Use contrasting colors to make these details stand out. - Step 7: Varnish and Protect
To preserve your masterpiece, apply a protective layer of varnish over the entire model. This will safeguard the paint job and prevent any damage over time.

