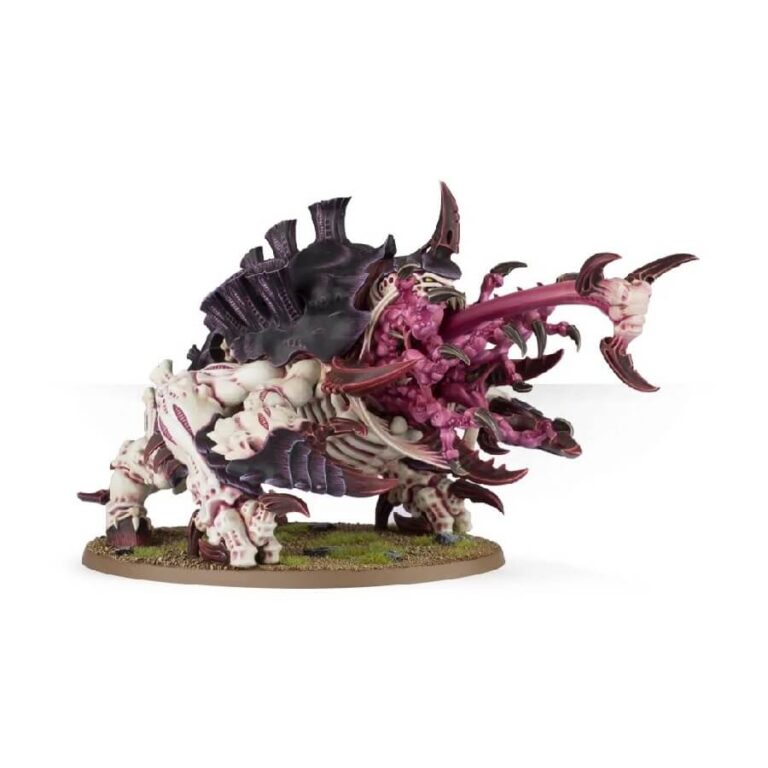
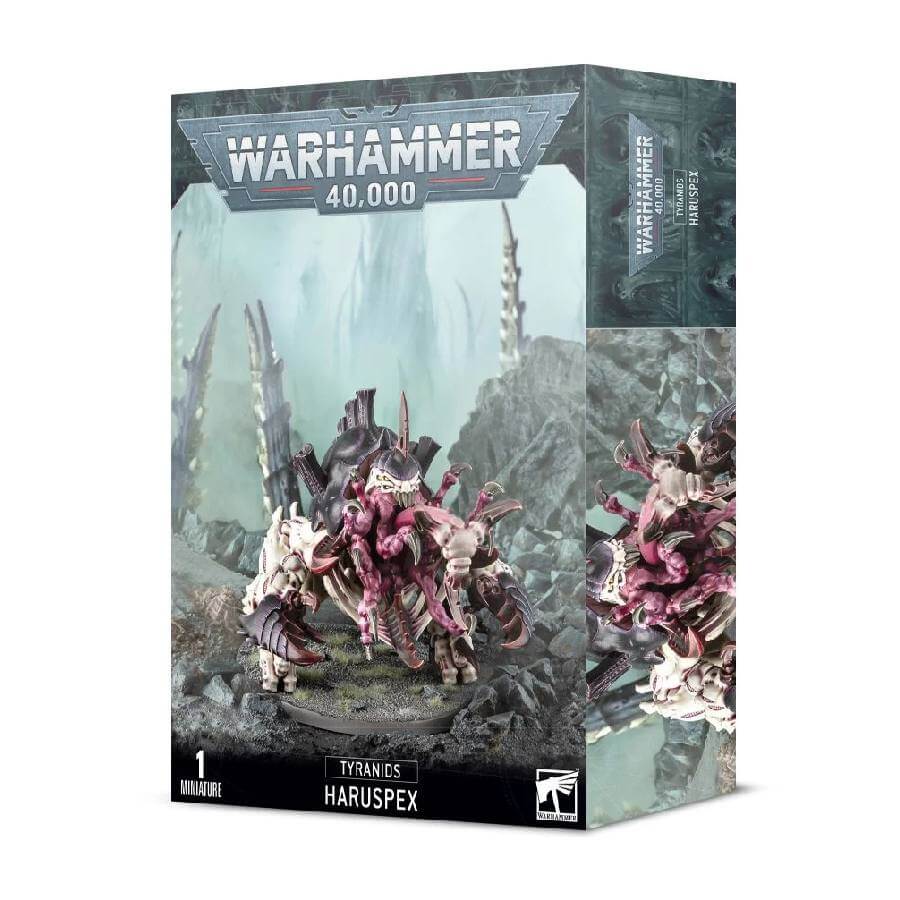
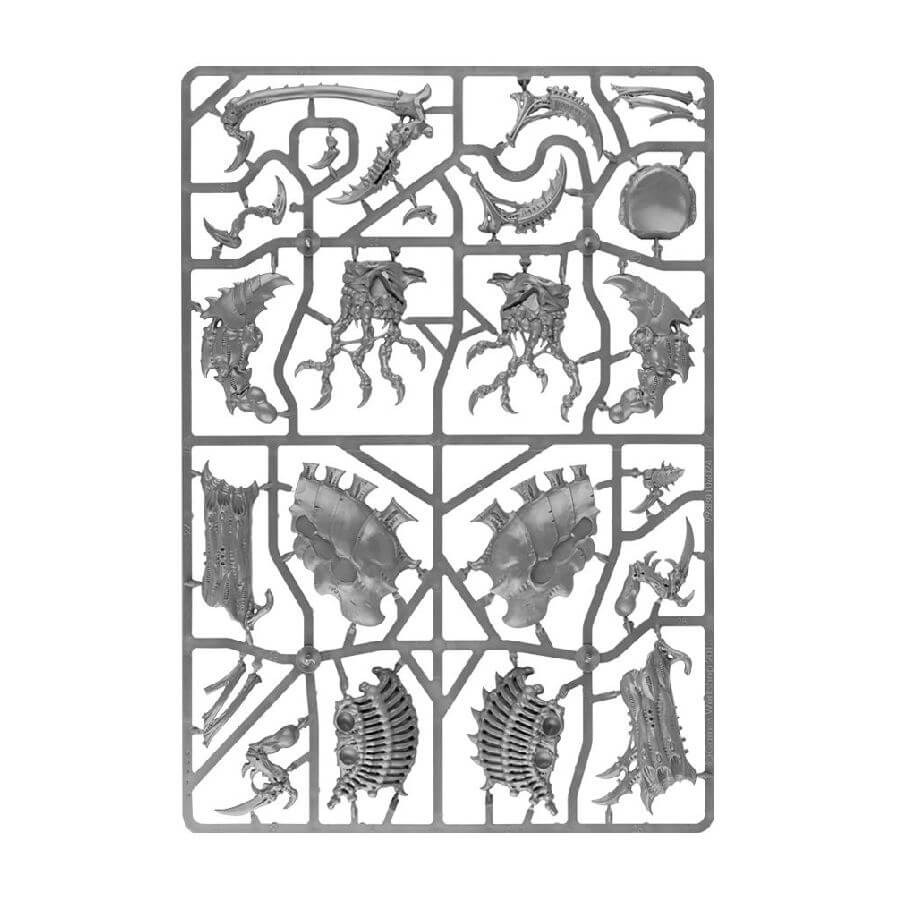
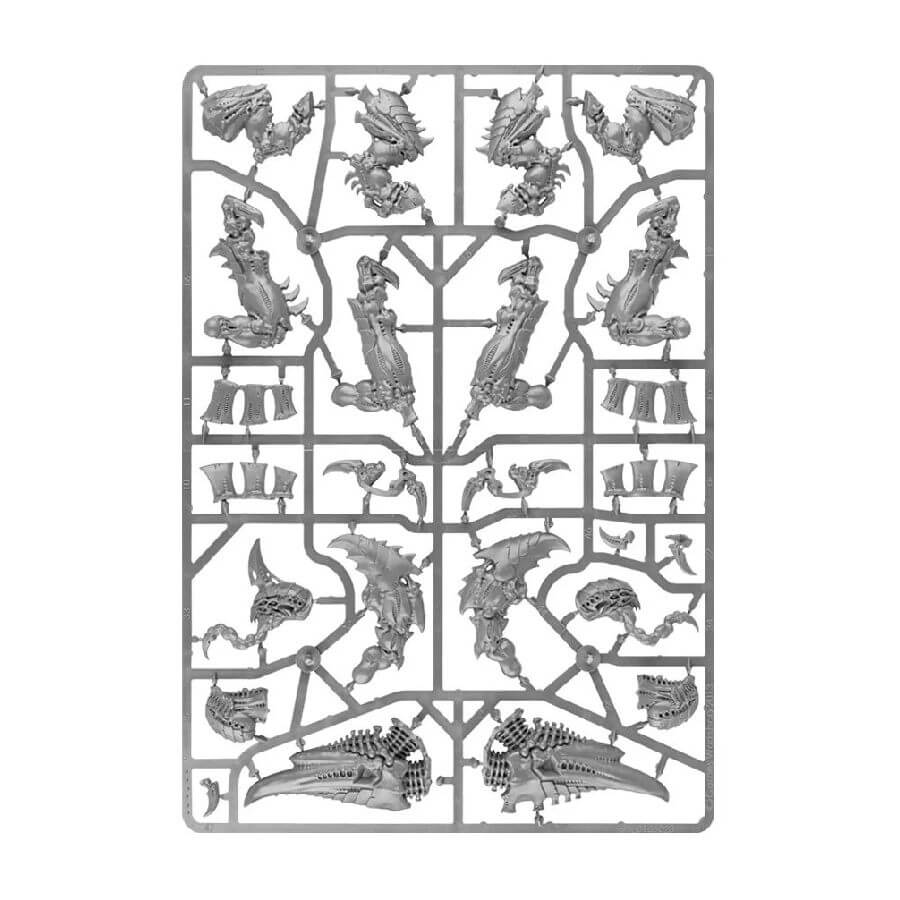
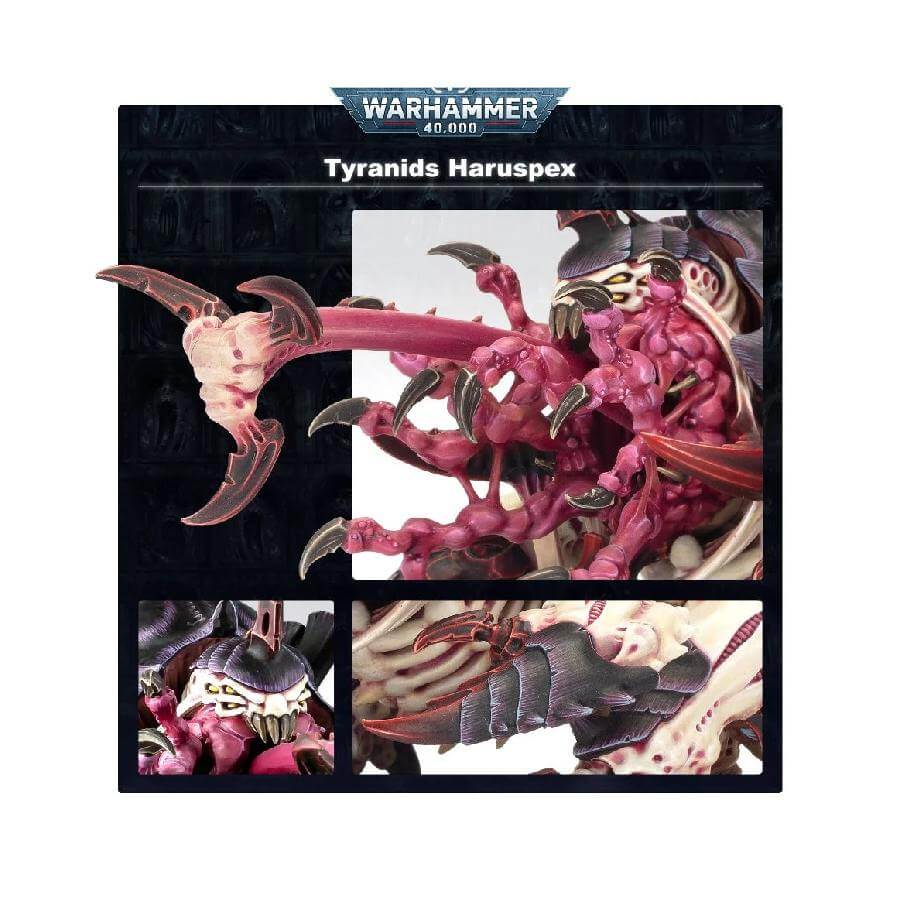
With its distinctive features, the Haruspex boasts a grasping tongue that forms an inside-out stomach equipped with three sets of menacing jaws. Additionally, it wields powerful crushing claws and sports a horned head unique to this monstrous predator. For added lethality, it can be armed with a thresher scythe tail biomorph, making it an even more formidable Tyranid force on the battlefield.
What’s in the Haruspex box
- x47 plastic components with which to make either a Haruspex or Exocrine.
- x1 Citadel 120 x 92 mm Oval Base.
How to paint the Haruspex set
- Step 1: Prepare the Model
Before starting, ensure the model is clean and free from any mold lines or imperfections. Use a hobby knife or file to gently remove any excess material. Then, assemble the Haruspex miniature according to the instructions provided with the kit. - Step 2: Prime the Model
Apply a thin coat of primer to the entire model. Black or grey primer works well for the Haruspex, providing a solid base for the subsequent layers of paint. - Step 3: Base Colors
Begin by painting the carapace of the Haruspex with a dark purple color, such as Xereus Purple. Use a medium brush and apply two thin coats for smooth coverage. For the skin, use a white color like Ulthuan Grey, and carefully paint the model’s flesh. - Step 4: Details and Highlights
With a smaller brush, add pink details to the Haruspex, such as the tongue, fleshy parts, and any other areas you want to highlight. For this, you can use colors like Emperor’s Children or Pink Horror. - Step 5: Add Contrast
To add depth to the model, use a wash, like Druchii Violet, over the purple carapace. Apply the wash into the recesses and crevices to create shadows and enhance the menacing appearance of the creature. - Step 6: Painting the Horns and Claws
Paint the Haruspex’s claws and horns with a bone color, such as Ushabti Bone. Ensure you apply thin layers to build up the color gradually, avoiding any heavy brushstrokes. - Step 7: Finishing Touches
Add any final details and highlights to the miniature. You can use brighter colors, like a lighter purple or white, to create further highlights on the carapace, skin, and other areas. - Step 8: Basing
For the base, you can use texture paints, like Stirland Mud, to create a natural look. Then, add some static grass or tufts to add realism to the model’s environment. - Step 9: Varnish
To protect your hard work and give the model a nice finish, apply a layer of varnish. A matte varnish such as Stormshield will remove any shine and provide a more realistic look to the Haruspex.