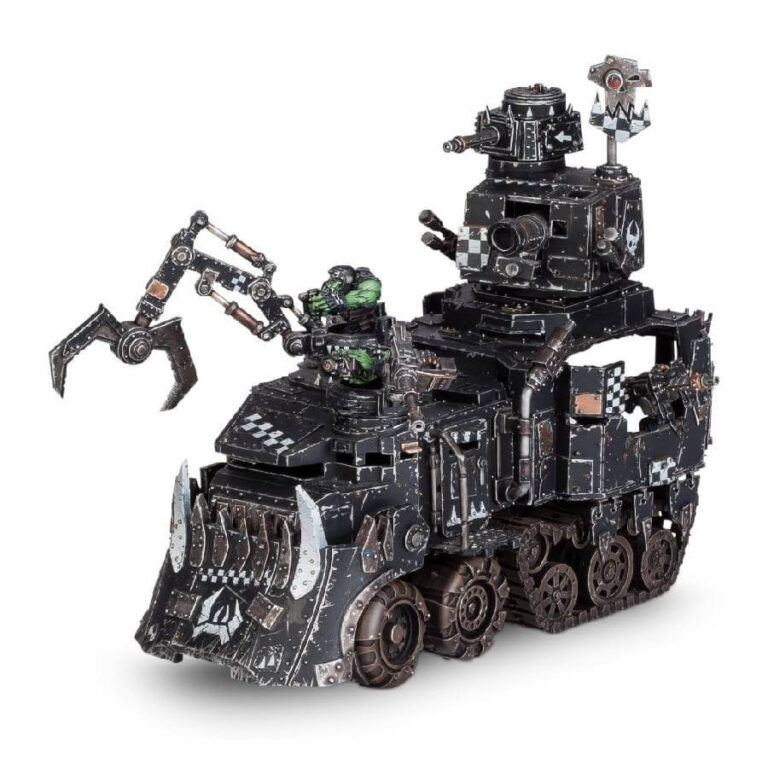
The Gunwagon, a formidable choice in Ork Heavy Support, sacrifices some of its transport capacity to be armed with a variety of powerful and large guns. With expert spotters directing spirited but imprecise artillery fire, it rains destruction upon the enemy. Even if things go awry, the explosion from its capacious magazines is sure to take a few foes with it.
Engage your enemies with devastating ranged firepower from the secure confines of the Gunwagon, while also having the flexibility to transport your Boyz across the battlefield. Customize your Gunwagon further by choosing from a wide array of additional weapon options to suit your battle strategy.
What’s in the Gunwagon box
- x135 plastic components that make one Gunwagon. The kit includes options for a big shoota, kannon, killkannon, lobba, zzzap gun, deff rolla, grabbin’ klaw, and wreckin’ ball and can alternatively be assembled as a Battlewagon or a Bonebreaka.
How to paint the Gunwagon set
- Step 1: Basecoat the Hull
Begin by applying a basecoat of Mephiston Red for a bold red hull or Alaitoc Blue for a striking blue hull, using a medium-sized brush. Ensure even coverage, as this will serve as the foundation for the rest of the paint job. - Step 2: Shading the Hull
Using Nuln Oil shade for the red hull or Drakenhof Nightshade shade for the blue hull, apply a wash to the hull to add depth and create shadows. This step helps bring out the details and adds a weathered look to the vehicle. - Step 3: Highlighting the Hull
Once the wash has dried, use Evil Sunz Scarlet for red hulls or Baharroth Blue for blue hulls to highlight the raised areas. Use a fine detail brush to carefully pick out the edges and contours, creating a sense of dimension. - Step 4: Painting the Guns
For the guns and other metallic parts, use Leadbelcher to add a realistic metallic shine. You can then apply a wash like Nuln Oil to the metallic areas to deepen the shadows and give them a weathered appearance. - Step 5: Adding Details
Paint any additional details on the Gunwagon, such as glyphs, symbols, or any Orky gubbins, using contrasting colors like white, yellow, or black to make them stand out. - Step 6: Tires and Tracks
Paint the tires and tracks with Abaddon Black, and then dry brush a lighter shade, such as Mechanicus Standard Grey or Administratum Grey, to highlight the edges and give them a worn look. - Step 7: Weathering
To add a touch of realism and battle-worn appearance, you can use a sponge or stippling brush to dab on some weathering effects using Typhus Corrosion or Ryza Rust. - Step 8: Varnish
Finish your Gunwagon off with a layer of Citadel Munitorum Varnish to protect the paintwork and give it a uniform finish.

