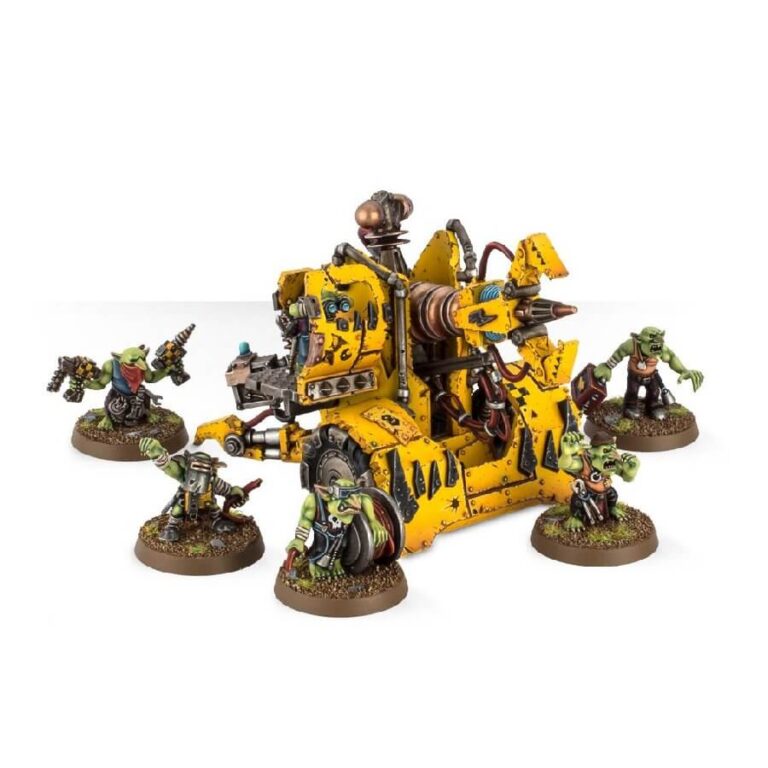
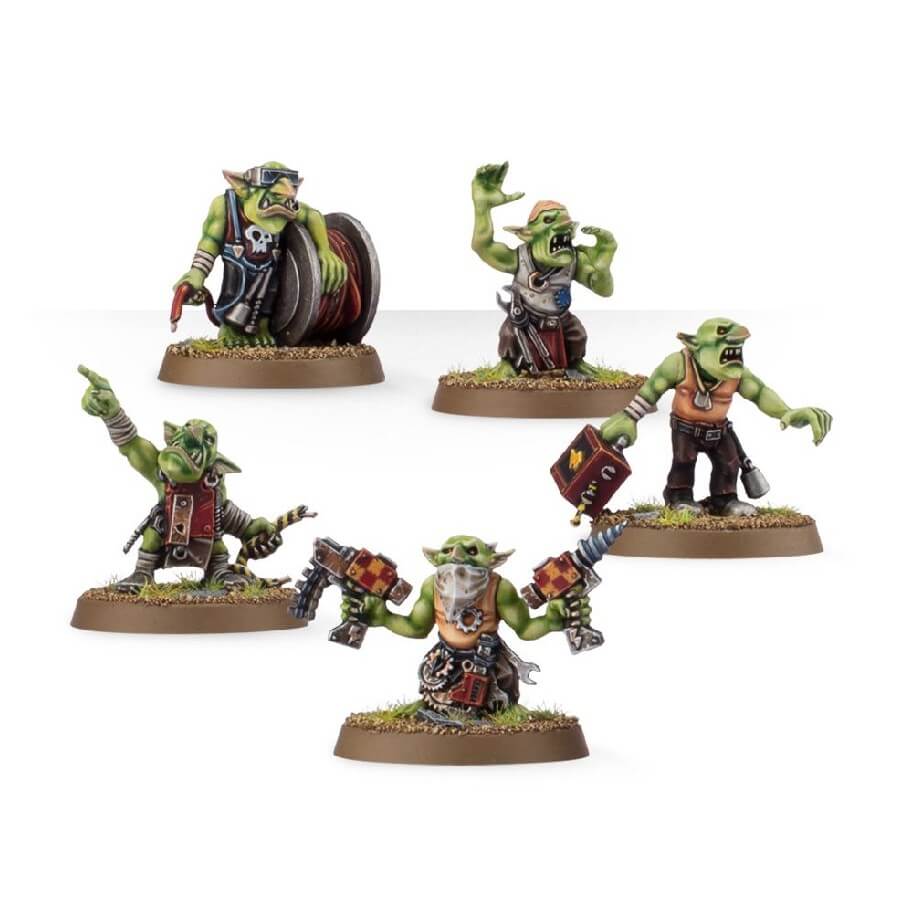
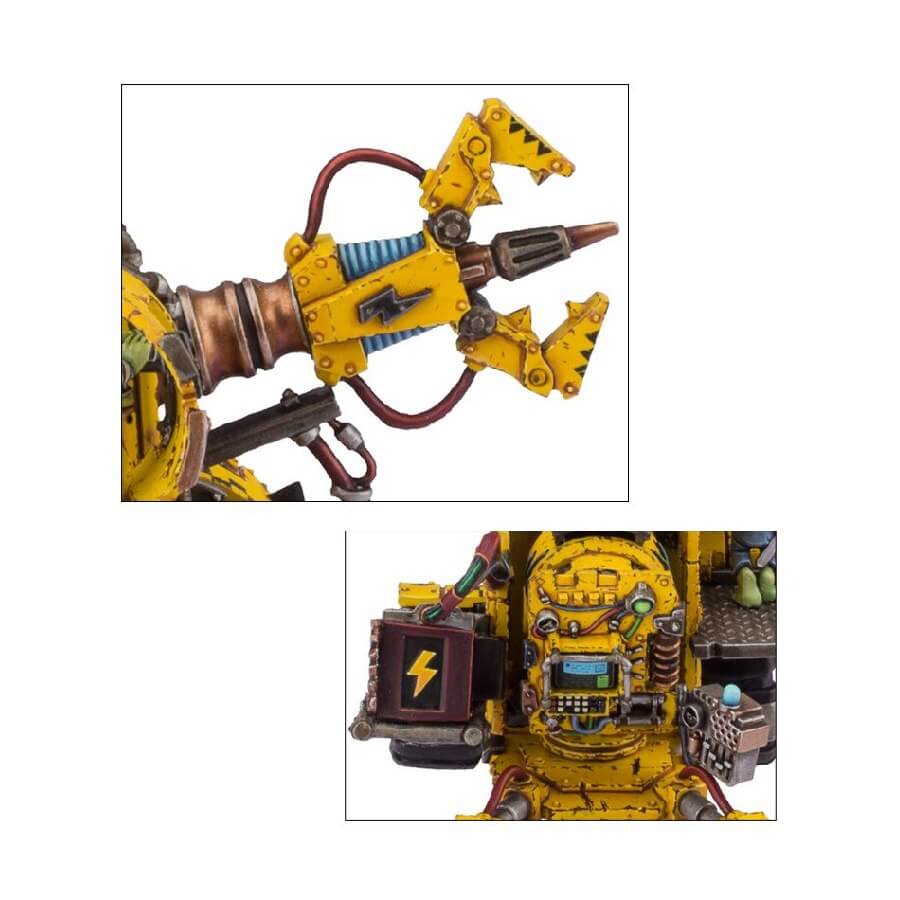
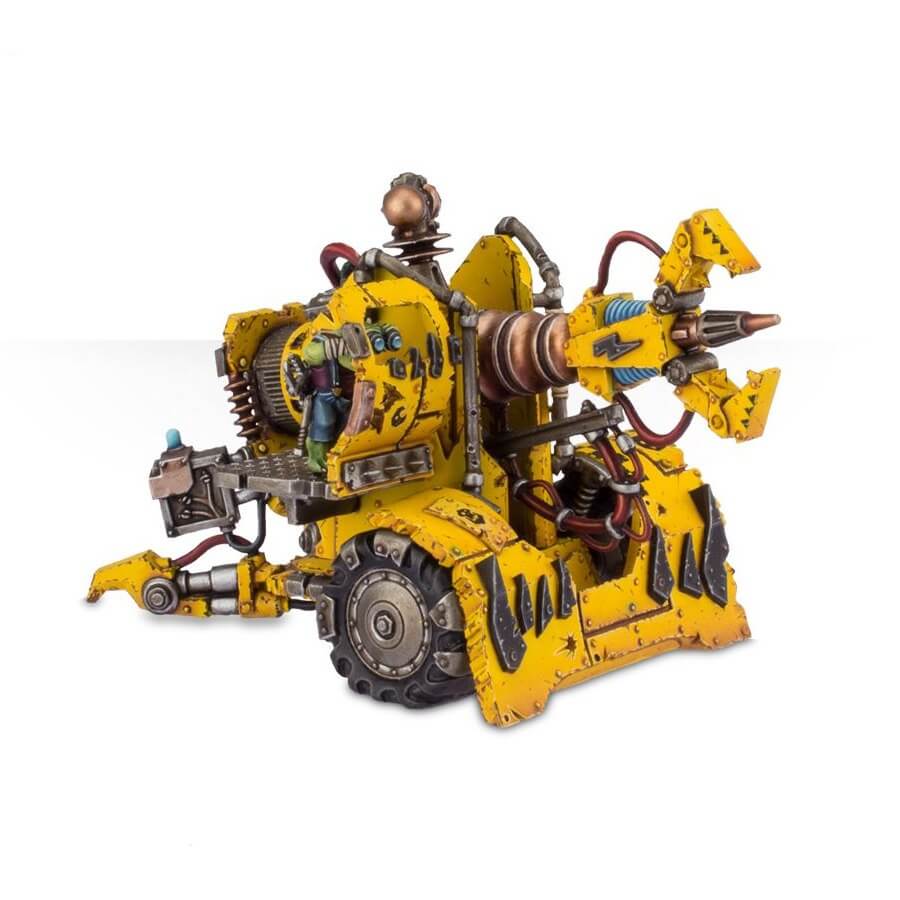
The Mek Gunz are a formidable Ork force on the battlefield, capable of obliterating even the most resilient targets with their overwhelming firepower. Operated by loyal grots, these clanky field guns have spelled doom for countless adversaries.
Utilizing the innovative lifta-droppa technology, these weapons ensnare their targets within a localized force field, hoisting them into the air and delivering a crushing blow akin to an invisible giant fist. The unpredictability of the Mek Gunz adds an element of fear for those unfortunate enough to face them, as their true intentions remain shrouded until the moment they unleash devastation upon the enemy.
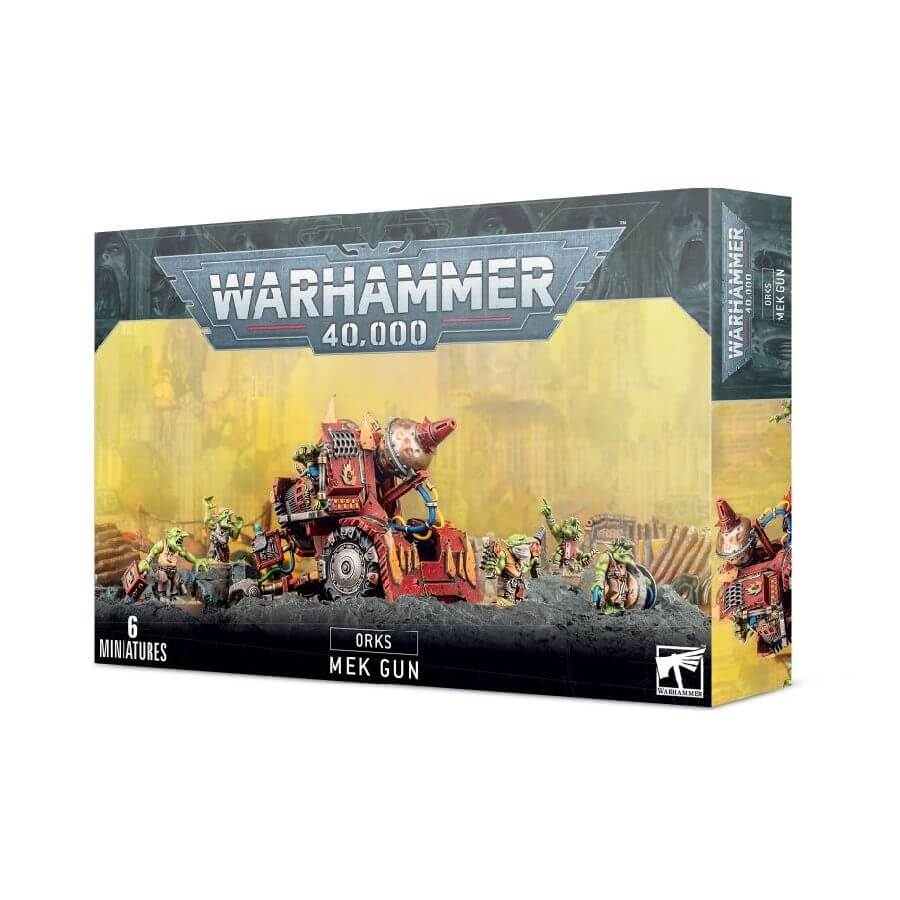
What’s in the Mek Gunz: Smasha Gun box
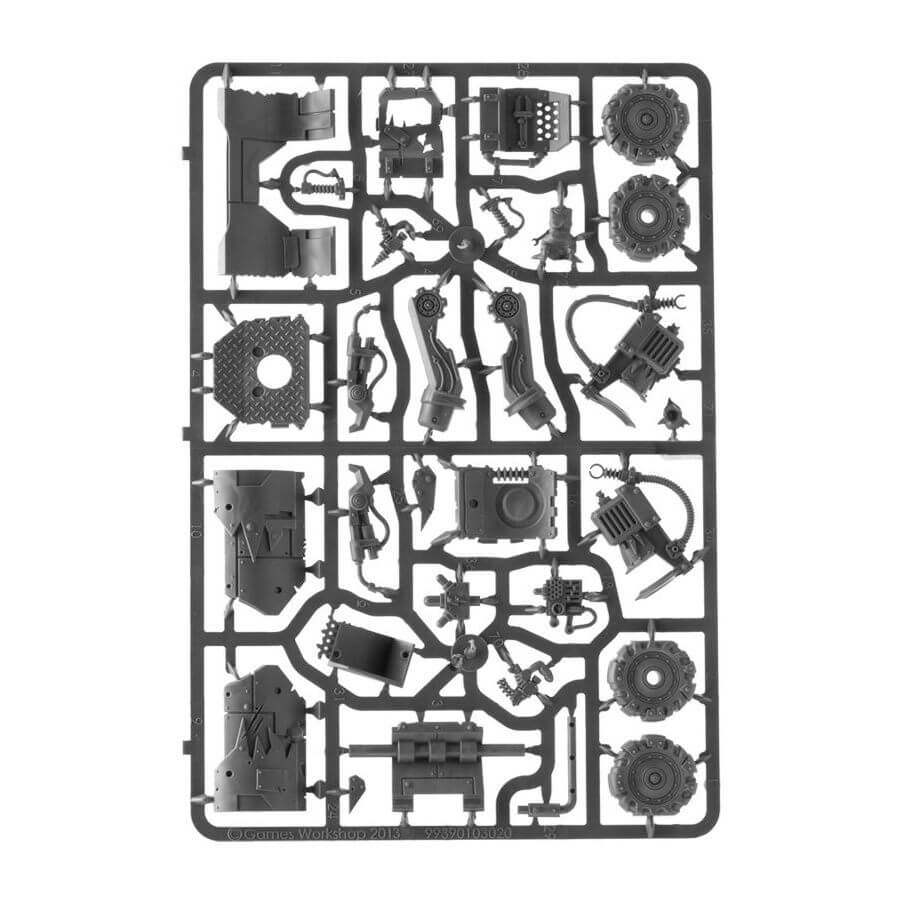
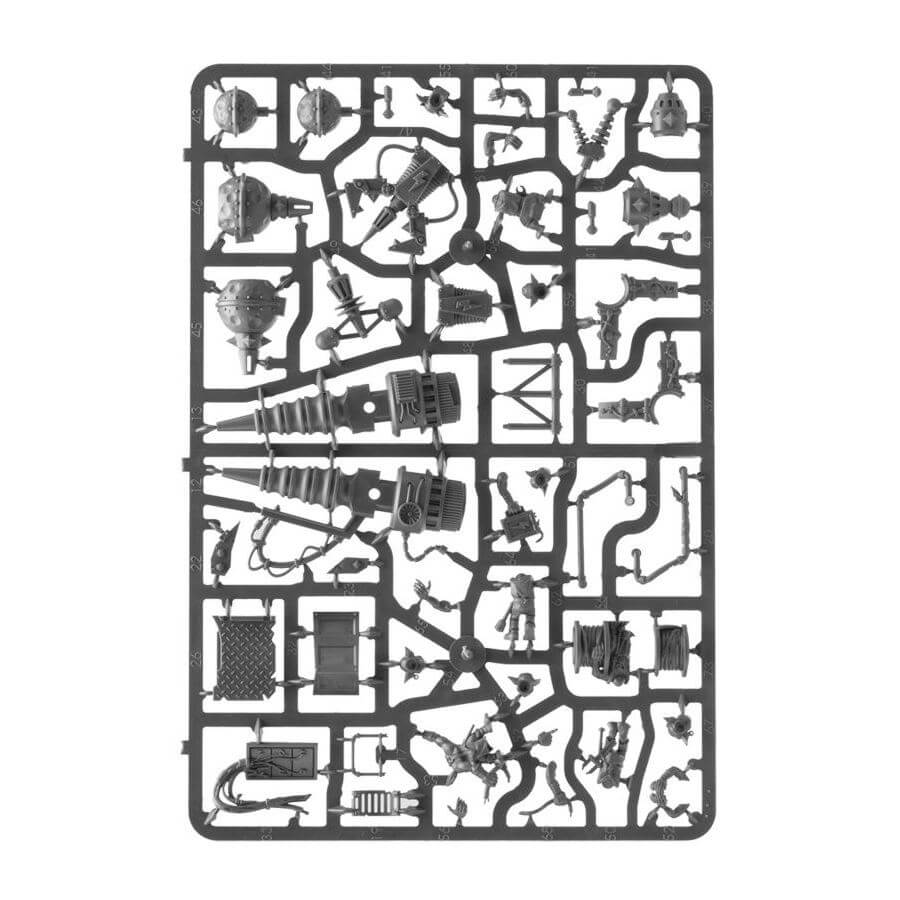
- x79 plastic components that make one of four possible Mek Gunz and 6 Gretchins. It can be assembled as a bubblechukka, a smasha gun, a traktor kannon or a kustom mega-kannon.
- x5 Citadel 25mm Round Bases for the Gretchins.
How to paint the Mek Gunz: Smasha Gun set
- Step 1: Prepare the Smasha Gun and Gretchin Crew
Prime the Smasha Gun and Gretchin crew with a spray primer. Apply a base coat of Averland Sunset to the Smasha Gun and Castellan Green to the Gretchin crew. - Step 2: Add Depth to the Smasha Gun
Use Abaddon Black to paint the details of the Smasha Gun, such as rivets and mechanical parts. - Step 3: Enhance the Smasha Gun
Highlight the edges and raised areas of the Smasha Gun with Yriel Yellow to create a vibrant effect. - Step 4: Bring the Gretchins to Life
Paint the Gretchin crew with Castellan Green as a base coat and add details using appropriate colors like Skarsnik Green, Zandri Dust, and Mephiston Red for their clothing, teeth, nails, and eyes respectively. - Step 5: Add Depth to the Gretchin Crew
Apply a wash of Agrax Earthshade over the Gretchin crew to create shadows and enhance the details. - Step 6: Bring out the Highlights
Use drybrushing techniques with Warboss Green on the Gretchin’s skin and Ushabti Bone on their teeth and nails to add highlights and texture. - Step 7: Create Realistic Wear and Tear
Apply weathering effects such as drybrushing with Ryza Rust on metallic areas and stippling with a sponge using Rhinox Hide and Mournfang Brown to create rust and dirt effects on the Smasha Gun. - Step 8: Finishing Touches
Paint any additional details on the Gretchin crew, such as their weapons and accessories, using appropriate colors. Once all the paint has dried, apply a coat of Ardcoat or any glossy varnish to protect the paint and give the models a finished look.
